Migrate WordPress.com to Self Hosted WordPress.org : Complete 2026 Guide
If you have outgrown WordPress.com, you are not alone. Each year, thousands of bloggers move to self-hosted WordPress. Business owners do too. The wordpress com to org migration process can feel scary. You may have spent years building your content and your search rankings. But with the right plan, the move is totally doable.
This guide walks you through every step of moving from WordPress com to WordPress org in 2026. You will learn what transfers cleanly. You will learn what breaks. You will learn how to protect your SEO. Every tip here comes from real migration work.
The safer way to make the move
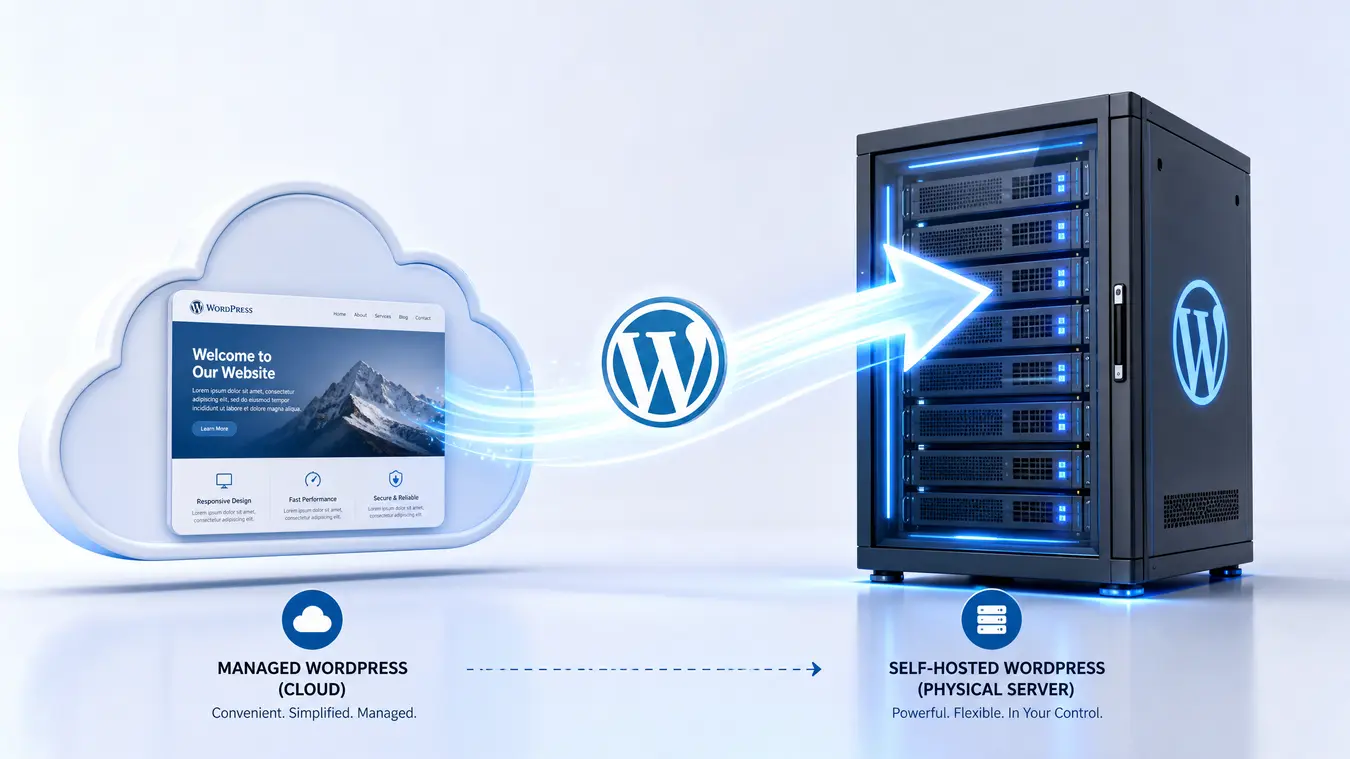
The complete WordPress.com to WordPress.org migration plan—without losing control.
Move to self-hosted WordPress with a safer plan for content, media, themes, plugins, SEO, 301 redirects, DNS, subscribers, forms, analytics, security, backups, and launch testing.
Starting point
WordPress.com
Managed platform · Your existing content
Destination
Self-hosted WordPress
Your host · Your plugins · Your control
Transfer what matters
Move posts, pages, comments, authors, categories, tags, and media—then check what XML does not carry over.
Rebuild what breaks
Prepare for themes, plugins, custom CSS, blocks, menus, forms, scripts, and settings that need manual work.
Protect the launch
Use staging, backups, matching URLs, 301 redirects, DNS checks, SSL, analytics, and a rollback plan.
Should You Migrate? (Decision Framework)
Before we start, let us make sure a migration is the right move. Our guide on the WordPress.com vs WordPress.org decision covers the big differences. A migration is a big step. You should only take it if your needs demand it.
You should migrate if you need plugins that WordPress.com blocks. Think advanced SEO tools or custom security setups. You should also migrate if your traffic has grown past what WordPress.com handles well. Or if you pay for the Business plan. Self-hosted hosting often gives you more for the same price.
On the other hand, if you just want to remove WordPress.com ads, a simple upgrade might fix that. Check our guide on whether the WordPress.com Free Plan is worth upgrading. If your site is simple with no custom code, read our article on whether the WordPress.com Business Plan is worth it in 2026 before you leave.
What Transfers Cleanly vs What Usually Breaks
Knowing what moves during an export is the most important part of planning. Many users are shocked when their new site looks totally different from the old one.
| Data Type | Transfers Cleanly | Usually Breaks / Needs Fixing |
|---|---|---|
| Posts & Pages | Yes (text, titles, dates) | Custom formatting or shortcodes |
| Media Files | Images and videos (via URL) | If source site goes private too soon |
| Users & Authors | Yes (basic profiles) | Custom roles or plugin permissions |
| Comments | Yes (approved and pending) | Spam and trashed comments excluded |
| Themes & Design | No | Must install a new theme |
| Plugins & Settings | No | Must reinstall manually |
| Custom CSS/JS | No | Must copy to new theme |
| Jetpack Features | Partially | Stats and likes do not transfer |
Here is the key thing. The standard export tool does not include your actual image files. It creates an XML file with links to your old images. Your new site must download those images during import. Make your old site private too soon. Your entire media library will vanish. This is the top reason migrations fail.
Complete Step-by-Step Migration Guide
Follow these steps carefully. We suggest doing this during low traffic so you can test everything first.
Step 1: Prepare Your WordPress.com Site
Before you export anything, get your site ready. This step can mean the difference between a 30-minute move and a 3-hour headache.
First, set your site to public. Your new site needs to download your images from your old site. That only works if the old site is public. You can make it private again after the move is done.
Second, clean up. Delete draft pages you no longer need. Remove spam comments. Turn off unused plugins. These steps shrink your export file and keep junk from carrying over.
Third, list every plugin you currently use. You will need to reinstall each one on your new site. Note which are free and which need a paid license.
Step 2: Export Your WordPress.com Content
You have two export methods. The right one depends on your plan and site complexity.
Method A: The Standard XML Export (All Plans)
This free method works on every plan, including the free tier. It exports your posts, pages, comments, categories, tags, and links to your media files.
- Log in to your WordPress.com dashboard.
- Go to Tools → Export.
- Pick “All content” and click “Download Export File.”
- Save the XML file to your computer right away.
If your site has more than about one thousand posts, WordPress.com will email you a zip file. It will contain multiple XML files. Import each one separately on your new site.
Method B: All-in-One WP Migration Plugin (Personal Plan and Up)
If you are on a paid plan, you can use the All-in-One WP Migration plugin. This exports your entire site: database, media, themes, and plugins. It is much safer for complex sites.
- Install the “All-in-One WP Migration” plugin on your WordPress.com site.
- Go to the plugin dashboard and click Export → Export to File.
- If you are changing your domain name, use the “Find and Replace” feature. Type your old domain in the “Find” box and your new domain in the “Replace with” box.
- Download the
.wpressfile to your computer.
The free version works for sites under 2 GB. Bigger sites need the paid Unlimited Extension.
Step 3: Set Up Your New Self-Hosted Environment
Before importing your data, you need a new home. You need three things. Good hosting. A domain name. A fresh WordPress install.
First, buy a hosting plan. We cover our top picks below. Make sure your host offers managed WordPress support, daily backups, and SSL certificates.
Second, register or connect your domain name. If you already own one through WordPress.com, keep it there for now. You can update the DNS records later. If you do not have a domain yet, most hosts include a free one for the first year.
Third, use your host’s one-click installer to set up a fresh WordPress.org site. This takes a few minutes. You get a clean dashboard at yoursite.com/wp-admin. Do not install any themes or plugins yet. You want a blank slate.
Step 4: Import Your Content
Now you bring your data over. The steps differ based on your export method.
If you used the standard XML export:
- In your new WordPress.org dashboard, go to Tools → Import.
- Install the “WordPress” importer plugin and click “Run Importer.”
- Upload your XML file.
- This is the most important step: Check the box that says “Download and import file attachments.” This forces your new site to grab your images from the old site. Skip this, and your new site will have no pictures.
- Assign your authors and click Submit.
If you used the All-in-One WP Migration plugin:
- Install the same plugin on your new WordPress.org site.
- Go to Import From → File and pick your
.wpressfile. - The plugin replaces your new site’s database with your old site’s data. Your structure comes over. Your themes, plugins, and media come over too.
About import timeouts: If the import page seems to freeze or shows an error, do not panic. This is very common with large sites. Go back to your dashboard and check your Posts list. In most cases, everything imported fine. The timeout is just a display issue.
Step 5: Polish and Configure Your New Site
Your content is on the new site now. But it probably needs some cleanup.
First, fix your navigation menus. Go to Appearance → Menus and assign your menu to the “Primary” location. Your old WordPress.com menu will not show up automatically. Themes use different menu spots.
Second, check your permalinks. Go to Settings → Permalinks and match the old WordPress.com URL structure. WordPress.com uses “Post Name” by default. This match is critical for keeping your SEO rankings.
Third, reinstall your plugins. Install Jetpack first. It brings back the Layout Grid block, stats, and subscriber tools. Then install your other plugins from the list you made earlier.
Fourth, check every page type on your front end. Look at the home page, single posts, category pages, and your contact page. Make sure layouts look right. Pay special attention to multi-column pages and custom blocks.
Setting Up 301 Redirects Correctly
A wordpress com to org migration will hurt your SEO badly if you skip the 301 redirects. A 301 redirect tells search engines and users that your content has permanently moved. Without it, old links will show 404 errors. Search engines will drop your pages from their index.
Scenario A: You are keeping your custom domain
If you owned a custom domain through WordPress.com, the redirect process is simple. Just update your DNS settings. Point your A Record to your new host’s IP address. Update your nameservers. Once DNS spreads, users land on your new site. The domain stays the same. You do not need a WordPress.com Site Redirect. Old external links keep working on their own.
Scenario B: You are abandoning your .wordpress.com subdomain
If your site was at yoursite.wordpress.com and you are moving to a new custom domain, you must buy a Site Redirect from WordPress.com. This costs about $13 per year. It catches all traffic from your old subdomain. It sends it to your new site with a proper 301 redirect.
To buy it, go to Upgrades → Domains in your WordPress.com dashboard. Select “Add Site Redirect.” Enter your new site’s URL and check out.
Important: your new site’s permalinks must match the old WordPress.com format. WordPress.com uses a date-based format by default. If your new site uses a different format, post-level redirects will break.
Scenario C: You are transferring your domain to a new registrar
If you want full ownership of your domain, transfer it from WordPress.com to a registrar like Namecheap or your new host. The transfer takes 5 to 7 days. Your site stays live at WordPress.com during the transfer. There is no downtime.
Common Pitfalls & How to Avoid Them
Migrations have several common traps. Here are the ones we see most often, along with fixes.
The Layout Grid Disappearance
WordPress.com uses a plugin called “Layout Grid” for multi-column designs. When you migrate via XML export, this plugin does not come along. Your multi-column pages will stack into one ugly column.
The fix: install the free Jetpack plugin on your new site right away. Jetpack includes the Layout Grid block.
The SEO Penalty of Mismatched URLs
If you change your permalink structure during migration, you break every external link to your site. Search engines hit 404 errors. Your traffic drops fast.
The fix: match your old permalink structure exactly at first. If you must change it later, use a plugin like “Redirection” to map old URLs to new ones.
The Media Fetch Timeout
If your site has thousands of images, the import may time out and look like it failed. Do not panic. Check your Media Library on the new site. WordPress usually keeps processing in the background. If images are still missing after an hour, use a plugin to force a re-download from WordPress.com.
The Subscriber and Follower Loss
Your email subscribers and WordPress.com followers do not move automatically. Install Jetpack on your new site. Use the Subscriber Migration Tool to move your audience. Note that “likes” do not transfer. Followers must resubscribe manually for email notifications.
The Custom CSS Disappearance
Any custom CSS from your WordPress.com editor will not transfer with an XML export. Copy that code manually to your new theme’s custom CSS section. Or use a plugin like “Simple Custom CSS.”
When a Full Rebuild Is Better
Sometimes, migrating a complex site costs more effort than it is worth. Building a new site from scratch may be smarter.
Consider a full rebuild if your site depends heavily on custom code. This code may not work on a new theme. Consider it if you are changing your brand identity completely. Consider it if your current site is full of old, thin content you want to leave behind.
A fresh start lets you pick a modern, lightweight theme. It lets you write new, SEO-optimized content without dragging old baggage. But a rebuild is not smart if your site has strong organic search traffic tied to your current URLs. In that case, a direct migration with proper 301 redirects is the safer path.
Recommended Hosting After Migration
The whole point of moving to self-hosted WordPress is controlling your server. Pick the wrong host. Your new site may perform worse than your old WordPress.com site. That defeats the purpose.
For busy sites moving from WordPress.com, we recommend Managed WordPress Hosting. These hosts optimize their servers for WordPress. They handle caching, daily backups, security, and core updates for you.
Here are the features to look for.
LiteSpeed or Nginx server technology gives fast page loads. WordPress.com uses similar tech. You want your new host to match or beat that speed.
Daily automated backups with one-click restore protect you against migration errors.
One-click staging environments let you test changes before pushing them live.
Free SSL certificates give secure HTTPS connections.
WordPress-specific support from teams that understand plugin conflicts and database issues is essential.
Affordable Shared Hosting: Check out our top-rated, affordable shared hosting provider. Ideal for beginners making their first migration. Plans start around $3 per month with a free domain.
Managed WordPress Hosting: For businesses needing top-tier speed, security, and automated maintenance, view our top pick for managed WordPress hosting. These plans are built for sites with serious traffic and revenue goals.
Pre & Post Migration Checklists
Pre-Migration Checklist:
- Confirm you have full admin access to your WordPress.com dashboard.
- Buy your new domain name and hosting account.
- Back up your WordPress.com site content using the export tool.
- List all active plugins for reinstallation on the new site.
- Record your current permalink structure settings.
- Note any custom CSS, JavaScript, and analytics tracking codes.
Post-Migration Checklist:
- Spot-check at least ten random pages to verify posts, pages, and images imported.
- Set your primary navigation menu via Appearance → Menus.
- Install essential plugins: Jetpack, an SEO plugin, a security plugin, and a caching plugin.
- Set up 301 redirects if abandoning a custom domain on WordPress.com.
- Use the Jetpack Subscriber Migration Tool to move your email subscribers.
- Submit your new sitemap to Google Search Console.
- Update links in social media bios and email signatures.
- Set your WordPress.com site to private or activate the Site Redirect.
- Cancel any WordPress.com subscriptions you no longer need.
Final Advice
A good migration takes patience and careful steps. Do not rush. Test every link. Verify every image. Make sure your redirects work before you cancel your WordPress.com subscription. By planning your wordpress com to org migration well, you invest in the long-term growth and security of your site. You no longer rent space on someone else’s platform. You own your data, your design, and your future.
WordPress.com to self-hosted WordPress migration FAQs
How long does the migration take?
A small blog may take 45–60 minutes. A large or highly customized site can take several hours. Add more time for staging tests, media checks, redirects, and forms.
Will the XML export move my theme and plugins?
No. The standard export is mainly a content transfer. Your new site needs a compatible theme and separate plugin setup. Save custom CSS, scripts, widgets, menus, and analytics settings before you begin.
Will my images transfer?
The XML file contains references to media. During import, the new site must fetch the files from the old site. Keep the old site public and accessible until the media count and important images have been checked.
Do I need a 301 redirect?
If the public URL changes, use a tested 301 redirect from the old address to the matching new address. If you keep the same custom domain and only change DNS, the URLs usually remain the same. Treat a WordPress.com subdomain redirect as a separate case.
Can I move my WordPress.com subscribers?
Use the current subscriber migration process supported by Jetpack and verify the result after launch. Subscribers, followers, likes, and stats may not behave identically after the move, so record your current counts first.
Should I migrate or rebuild?
Migrate when your existing URLs and content have value. Consider a rebuild when the theme, code, structure, or brand is changing so much that a direct transfer would create more work. Keep a URL map either way.